Tuesday, November 30, 2010

Christmas Mantle Decor

Photobucket

I am in love with the mantle...after a few days of playing with it! One of the best parts is this is a budget project...what you see here are Target dollar ornaments (big and small glittery ones), Target 2$ bead garland, Target 1$ Holiday Mints, Target 1$ Snowflakes and Dollar store beaded ornaments for 1$ each. I had the garland, candle sticks (see the Goodwill redo here) and candy stripe ornaments already. Total cost 9 dollars...not to shabby huh?!?
For the candy garland I just hot glued each candy end to end. Use a low heat glue gun because you will get glue on your fingers! I used paperclips to keep the smooched together while they cooled. For my mantle I did 3 lengths of 17 candies and secured them to the garland. Looking at it now I will maybe do two more to finish off the edge...but I am not sure...what do you think?

Here are some more money shots of the mantle...I love how its fun and Christmasy with out being to stuffy looking.

 
Photobucket

Photobucket

Oh so pretty! 

I am sharing this project/redo with the blogs below.
Photobucket

The DIY Show Off

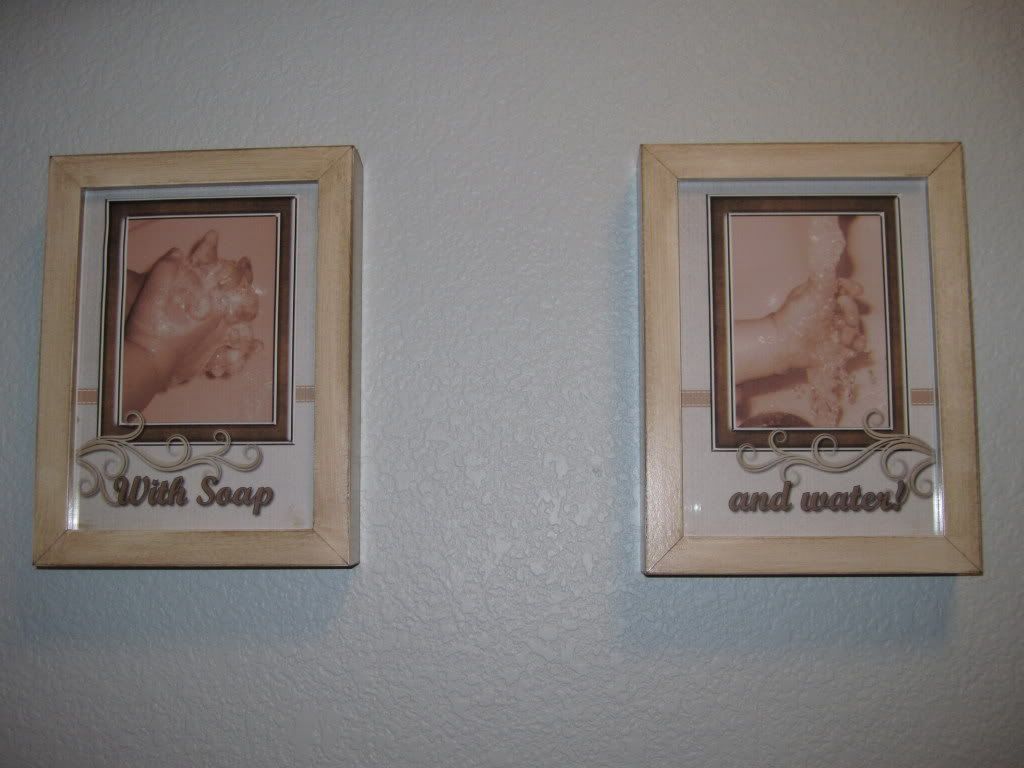
Wash Your Hands Take 2

Well I decided we needed more art in the hall bathroom. I took some cute pictures of the kids hands and created this! 
Photobucket
Specific instructions are always good with my kiddos.

Photobucket
Megan's little hands are still so cute!

Photobucket
James wouldn't sit still long enough for both hands...but its a cute hand all the same.


 All I needed was my camera, Scrapbook Max 2.0, two Ikea Ribba frames and some stain! 


The frame was origionally white, it could have worked but I wanted some interest so I used a old wash cloth and rubbed on some of my dark stain. 


Total cost for project...Free!!! I had everything needed, and the frames were maybe 2 bucks at Ikea months ago. 


I will be adding a few more things here and there to the room and will do a final reveal soon. 

Until next time!

Project shared here:
Blue Cricket Design

Photobucket

Sunday, November 28, 2010

Ornament Wreath

You know I love a deal...so when I saw that the dollar store had a gazillion ornaments that were cute...in my color scheme and a dollar...yeah duh...I jumped on it...well my husband did...he went and got them for me on a rainy day like the sweetie he is.

I have always wanted one of those 60 Dollar wreaths you see places like  Pottery Barn and the like...I decided to give it a go myself. Here is the how to.

So here we go.

Gather supplies...
Ornaments...lots of them...in different sizes
Glue Gun
Wire Hanger
Ribbon to hang wreath with
Pie...optional...but made it fun

Stretch your hanger into a circle...or your shape of choice.


Get your huge pile of ornaments and begin the long process of gluing the tops to the ornament...this will save you future headache...promise.

Photobucket

In a random fashion slide your ornaments onto the hanger, I did 4 or 5 at a time then arranged them to fit and hot glued them in place. 

Photobucket

Continue this process until you get to the end. Secure the hanger back together and tie a ribbon around the top to hang. Ta Dahh....easy peasy. I am thrilled that I spent 10 dollars on ornaments...I still had a ton to do my front entry decorations and they all coordinate! Love it! I may go back and add some more super small ornaments to fill in the spaces...or maybe some battery operated lights to give it some more twinkle...but I think it looks pretty darn good.

Photobucket

PS I am in love with Red, White and Silver this year...its my thing! Stay tuned for the front porch reveal...I am way excited to show you...just need it to not be freezing outside long enough for me to finish it.


Photobucket

The DIY Show Off


The Girl Creative


UndertheTableandDreaming
BWS tips button

DIY Club

Wash Your Hands...that's what the sign says

I was inspired by Tracy at Tracy's Trinkets and Treasures to tackle the following project.


I knew this would be just perfect in our hall bathroom. A message for kids, style for adults. I really enjoy doing tons of link parties because I find so many great projects and blogs, currently my "craft to do" bookmark has 30 or so projects. So yea for me for getting to check one off the list.

So here is my version of Tracy's big bathroom sign.

Photobucket
I am thinking of adding a small sign below...WITH SOAP!!!

Here is how I did mine.

Gather the supplies...
Wood...I got a 1x6 for a few bucks
Stain
Letters, I have a handy Cricut on loan so I used that and card stock to create my wording.
Mod Podge
Brush to apply stain and Mod Podge
3M Picture hangers
Pencil
Ruler
Drop Cloth or something to protect the area you are working on.

Photobucket

I stained the wood, brush on, wipe off until you get the color you want. Let dry a hour or so.

I did a little sanding to distress it a bit.

I used a T-Square to place the letters on the board evenly, applied Mod Podge and let dry.

I then did two coats of Mod Podge to seal everything nicely. I thought the white lettering was a little stark so I used the same brush I did for stain so I could get some streaking and color on the white letters.

Photobucket

Lastly after everything was dry I was ready to hang it. I measured where I wanted the sign to hang and applied the 3M picture hangers to both ends and stuck it to the wall.

I am thrilled with the look, for a few hours of work I have a custom piece of art that is fun and stylish.

Enjoy!


Photobucket

Thursday, November 25, 2010

Happy Thanksgiving

First and foremost...my family. I have a awesome family! We often disagree but we are a group of talented, loving and hugely sarcastic people.

The kids in the family are wonderfully funny little people with attitudes to match the grown ups. They make a ton of noise and drive us crazy, but they all make us laugh just as much. I enjoy watching them grow and really want them to slow down at the same time.

My husband is the best husband in the world, he works hard so I can stay home and raise our children. He does the dishes, with out bitching, he fills my water bottle at night since I always forget, he warms up my side of the bed before he warms up his own side on a cold night so its toasty when I get in. He is a amazing Dad. He is funny beyond measure and loves me, even when I am being "bossy and controlling" to quote my Dad's speech at our wedding.

Speaking of my Dad, he isn't technically my Dad, but men dont need to contribute to your genes to be your Dad. He is the first person I think of when I need advice on how to fix or build something, or when I cut my finger and need someone to fix it. He is who I call when I need a sounding board that is non-emotional and will tell me his honest opinion even if I don't like it. He loves me, he knows me better than I know myself sometimes. He is Poppy to my children, I love him and am so lucky to have him for my Dad.

My Sister is awesome, really that should sum it up but I can go on. She moved away last year for about six months, I hated it. We don't spend every moment together, but not having her close was terrible. She is my best friend and I look forward to us turning into old bittys together. She is fun to pick on too. She married a funny guy I enjoy picking on too. He will tell you the longest short story ever told, but ALWAYS gives the bad guy the benefit of the doubt...I never do that and admire his willingness to look for the good in people.

My Mom...I think all Mother daughter relationships are complicated. The love between us runs so deep you can not see the bottom. I am always calling for advice/opinions...on everything. Being her daughter I almost always do my own thing, but I still want to know her opinion. She is a talented and creative person, she made me who I am. She doesn't think the rest of us are as funny as we think we are, but when she gets a good laugh going she usually has tears running down her face and her cheeks hurt after a while. I wish she laughed like that more often. She has been a awesome Mom and a really AWESOME Grandma.

The Inlaws...My Father in law is a great guy. We have had a hard year adapting to loosing Becky my Mother in law, me miss her a lot. He has needed time to himself this year. But hopefully we will get to spend more time with him in the coming months. He is a very talented and smart man. He is loving and gives the best hugs around.

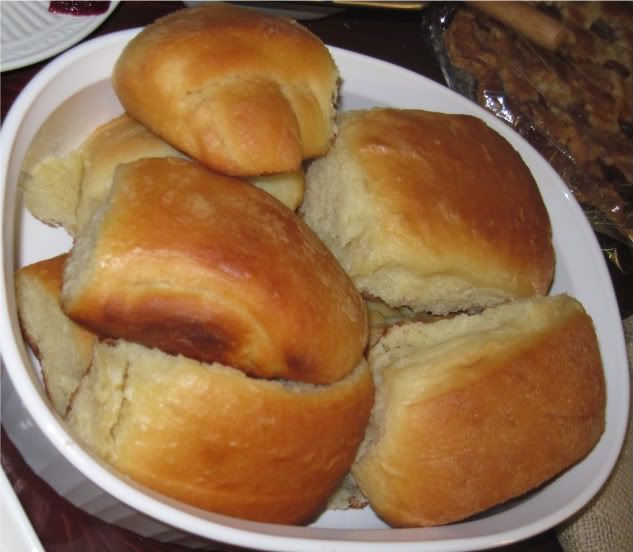
Ok...enough of the sap...we had a ton of yummy food today. I've done Thanksgiving for several years now and this year I think I finally have it down to a science. It was awesome to have zero stress...I'll let the pictures tell the story and post recipes later.
Sorry for being so wordy today!
Photobucket
We forgot to take a picture before we started carving...sorry for the bad angle and messy cutting board.

Photobucket
We do buffet style so we don't burn our delicate fingers with hot dishes.
Photobucket

Photobucket

Photobucket

Photobucket
From the highchair...James, Mike aka. Husband, Rich, Diana, Ruth (you can see her hair), Grandma Dot, and Megan.

Much love,
Photobucket

Tuesday, November 23, 2010

James is 10 Months Old!

Wow how times fly's! I can not believe it has been 10 months since we welcomed James into the world. He really has turned into a character this last month. His newest trick is making faces when you try to take a picture of him...a sign of things to come maybe? He enjoys torturing his sister, hitting, biting, drooling and so on. He knows that "No" means go faster or hit harder. He is bound and determined to get us a new TV no matter what he has to do...hit it with toy trucks, sippy cups or books. One of my favorite new talents of his is ability to give big sloppy kisses. We were walking through target this week and he looked up and pursed his lips...it was adorable, I of course gave him a smooch.  He decided I needed to kiss him every other step from that point on. If I missed a kiss he would pat my hand and stick his lips out. I think I'll remember that trip to the store forever, I have no idea what I purchased. 

Here are a few shots of Mr. Hot Stuff himself just before bath time. 


Photobucket

Photobucket

Photobucket

Photobucket

Photobucket

Monday, November 22, 2010

Thanksgiving Menu

Thought I was time for me to finalize our menu for Thursday...not to mention I got a new toy this evening and wanted to play with it. Meet my first project on Scrapbook Max.

Pretty cool right?!? I am really excited...I plan on doing our Christmas cards this way too...not to mention scrap booking, invitations and all kinds of other fun paper craft things! I learned about this software from Colette over at My Computer is My Canvas. I am thrilled to have this new tool for future projects. I am sure I will be referring to her blog a lot for tips and inspiration. Thanks Colette!

Photobucket

Sunday, November 21, 2010

Banded DIY Drapery Panel

Well here it is finally...3 windows, 8 panels turned into 6 panels...and I am in love with them. If I had been able to sit down with zero distractions they would have been done in one day, but who has that life?
From Restoration Hardware

This was my inspiration, while I love the dark brown on these panels I wanted something a bit more casual and at a price that wouldn't break my heart when there are kiddo hand prints on them.  Below is what I came up with.

You will need: (this is for one window, increase according to the number of windows you are doing)
Drapery Panels-two white and two linen. I used Ikea Lenda in cream and linen, at $14.99 a pair you can't beat it.
Sewing Machine 
Thread
Measuring tape
Fabric pen
Drapery Hardware


Step 1-Measure window, determine how high you want your hardware and how long you will need the panels to be. For my windows I hung the hardware at 120" and made the drapes 120". I like them to just touch the ground. 

Step 2-Iron your panels both white and linen. Lay them out on the ground and make measurement marks with measuring tape and fabric pen. I can't stress how important this is, it is really a drag to hang your panel up and have a super wonky seam at the bottom. Not that I did that or anything. I measured to make sure the panel was square, it wasn't. Then I marked my cream panel at 90".

Step 3-Measure and cut linen, I did 30", then allowed 3 inches for hem and seam for 33" total length.

Step 4-Make a crease along the line you measured out on both the cream and the linen panel. For a 120" panel I did 93" long for the cream and 33" for the linen.

Step 5-With right sides together line up the crease of the linen to the cream crease as shown. Pin and sew along the crease.

Step 6-Press seam flat, trim allowing for 1" of fabric.

Step 7-For a clean look to the back of your panel fold over raw edges and iron. Sew flat, I used the foot to measure the stitching equally on both the linen and cream.


Step 8- Press and sew hem. I fold over 1/2 and then 1" and sew for a clean hem. 

Step 9-If sides of panel are uneven between the cream and linen, press and sew. Mine of course were, but it wasn't hard to press the cream to the width of the linen and sew. 

For those of you who purchase pocket top panels you are done, hang and enjoy. If you purchase the Lenda from Ikea they come with tab top. That was not the look I wanted so I had another step. 

Step 10-Sew tab top over flat to the back of the panel (I of course forgot to take a picture of that step). Once sewn run your drapery rod through the pocked created by sewing over the tab tops. I was actually really pleased with doing this because it created a great pleated top look to the panels. 


Hope you find this to be a helpful tutorial. Hindsight being what it is I would have maybe done a contrasting tread so you could see the stitching on both sides of the seam between the cream and the linen. But as it is the detail is very pretty. 

This tutorial was linked Here...


Photobucket